Submerge
Github link: https://github.com/bigcrimping/submerge
submerge
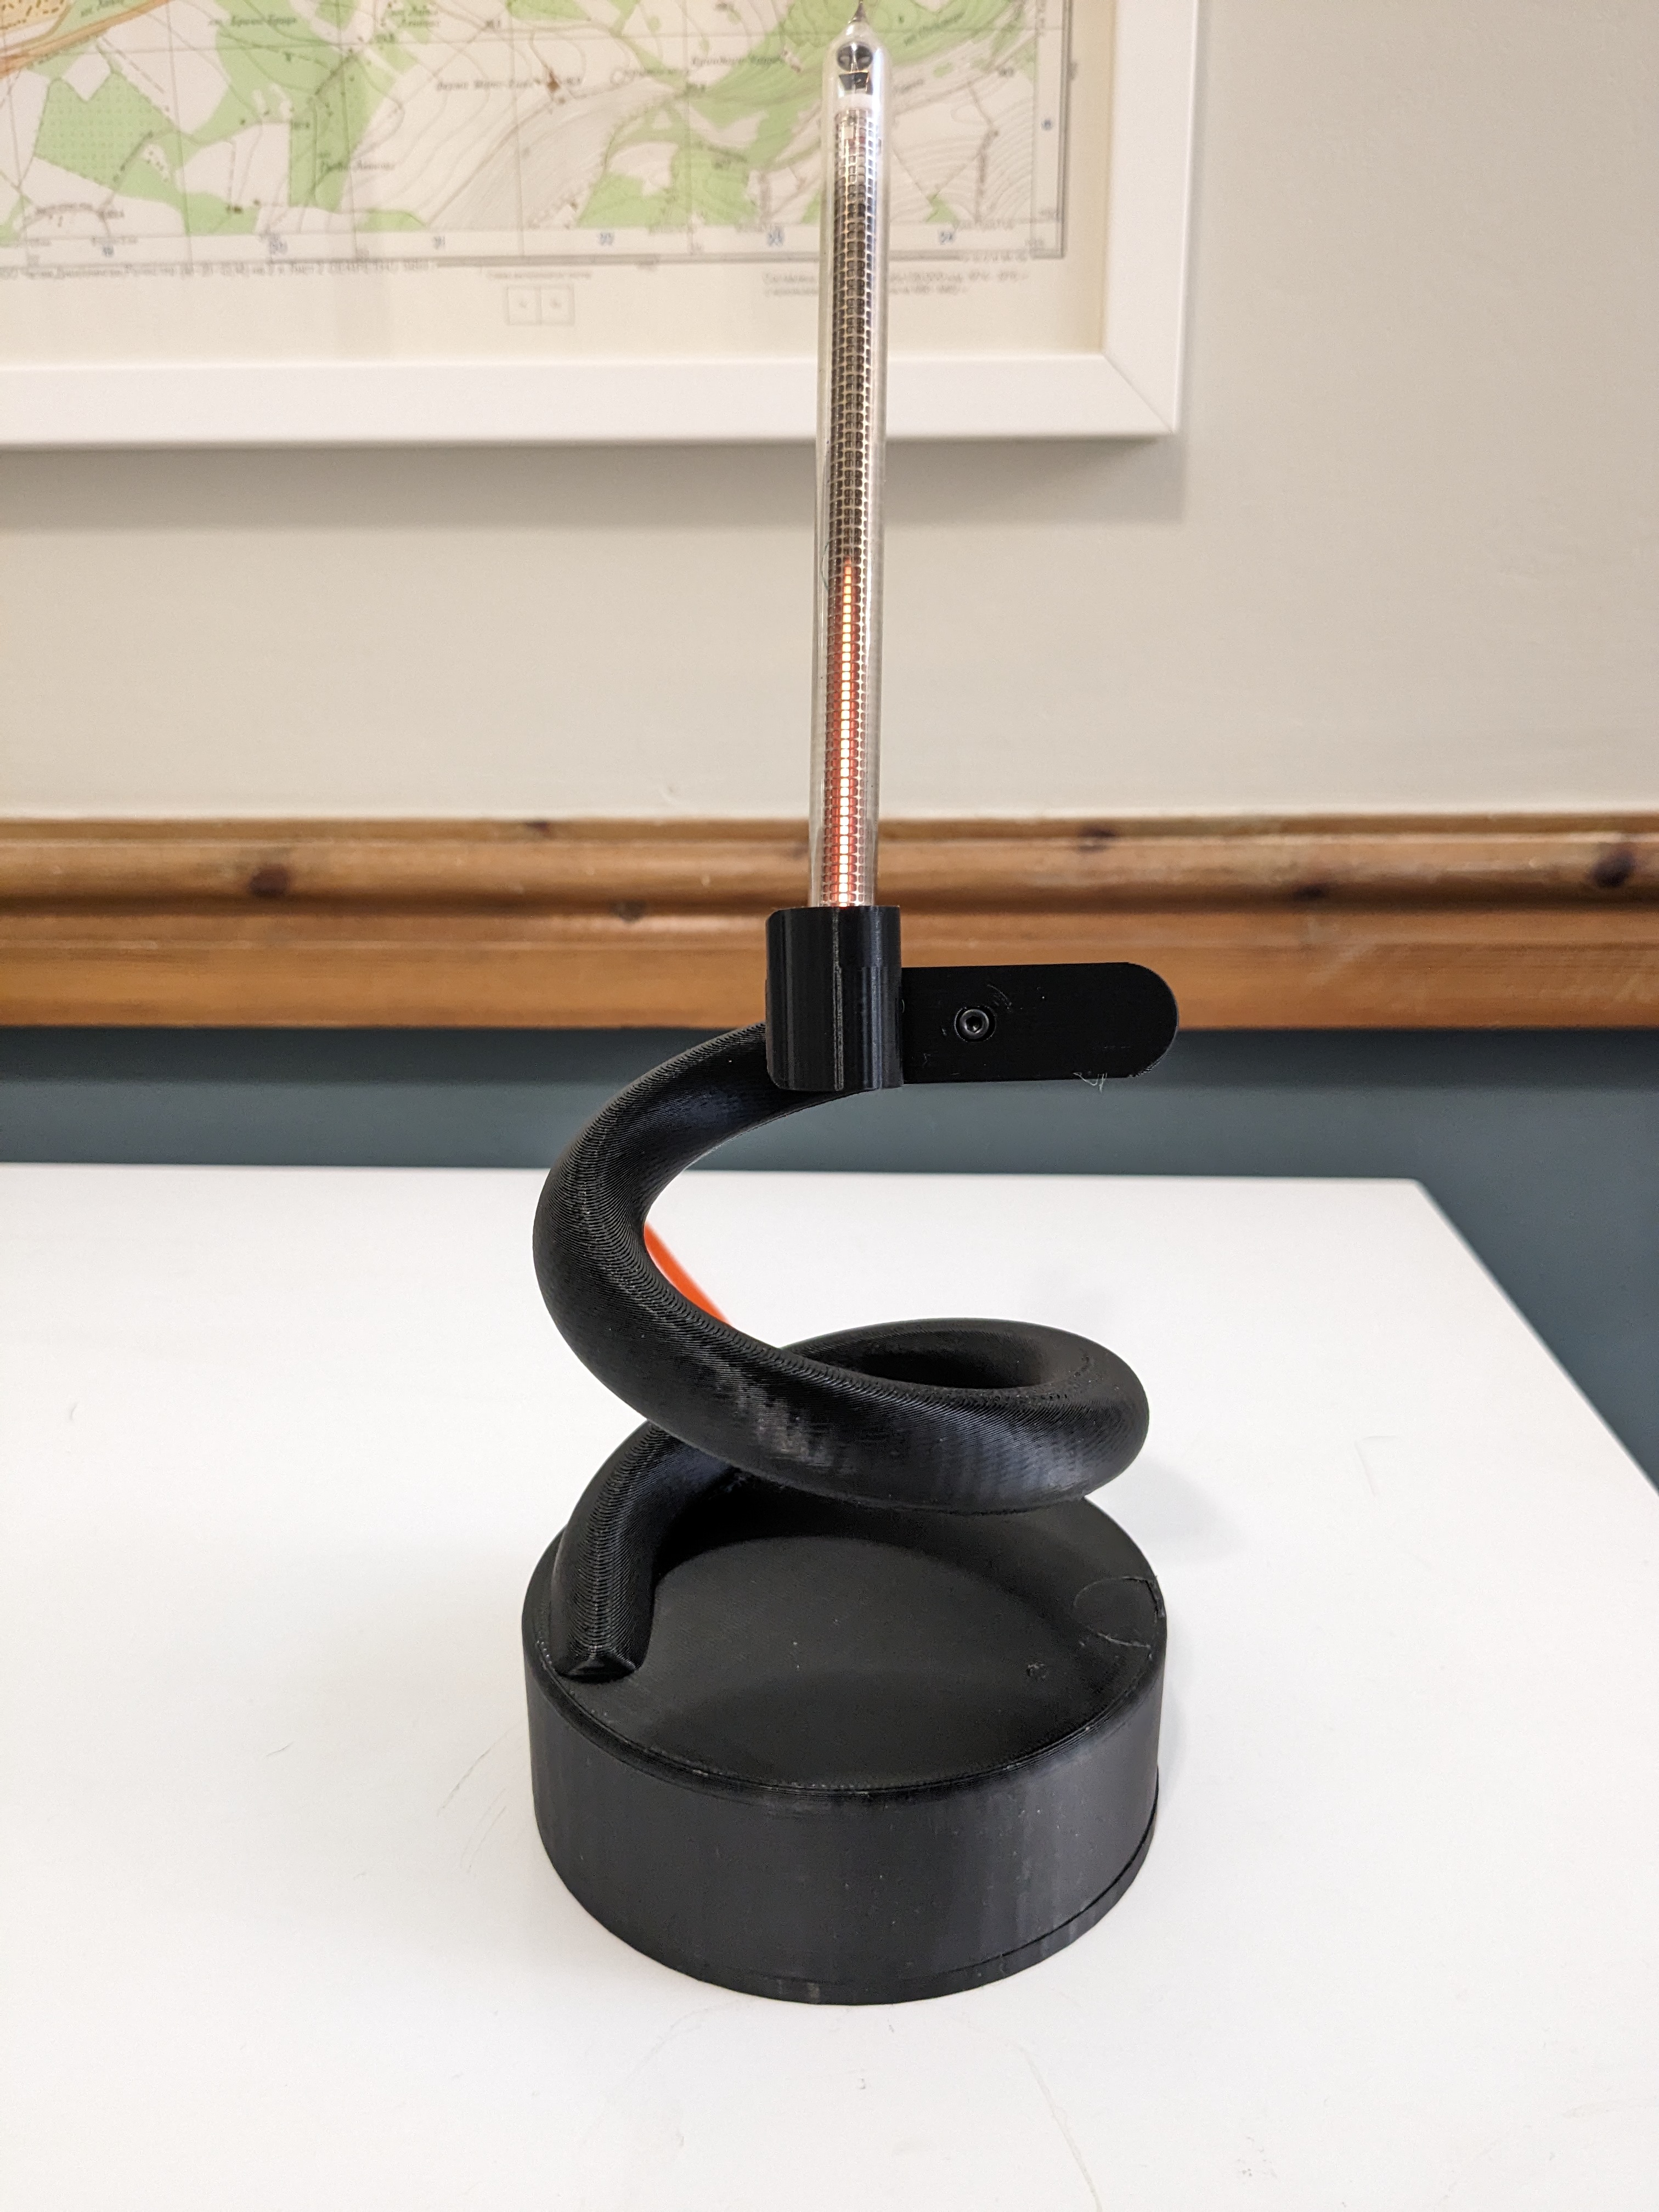
IN-9 based wave meter running on ESP8266.
The ESP8266 connects to the API from Coastalmonitoring.org https://coastalmonitoring.org/ and pulls the latest wave height and wave period from the chosen buoy and converts it to a PWM signal to drive a IN-9 device
Project Code
The code is here: https://github.com/bigcrimping/submerge/tree/main/code/bouy_code
You will need to add your WiFi details to the arduino_secrets.h as well as the key pair from https://coastalmonitoring.org/ccoresources/api/
Additionally you will need to install the following libraries:
https://github.com/esp8266/Arduino/tree/master https://arduinojson.org/
In the code you will find a routine “grab_data” which connects to the WiFi, connects to the API and requests the current wave height and period and returns it as floats. The API requires setting two custom HTTP headers
The display routing converts the wave period into a delay between each of the 84 samples in “wave_array[]” and scales it via the wave height.
The output full scale (PWM 255) is scaled to a max wave height of 6m which is a compromise between accuracy in extremely high wave conditions and not looking boring at normal (0.8-1.2m) heights
The API requests the following attribution:
“Real time data displayed on this page are from the Regional Coastal Monitoring Programme, made freely available under the terms of the Open Government Licence. Please note that these are real-time data and are not quality-controlled.”
Wiring
I’m usually quite happy to share wiring diagrams, but this project contains 150V power supply which at best is extremely unpleasant to touch and at worst could cause serious injury.
If you want to copy this project, get someone who understands the risks to look over your circuit before powering it up.
For the PWM current drive I stole the design from https://www.limpkin.fr/index.php?post/2021/05/24/The-IN-9-Nixie-Clock
The power supply is a generic “DC5V-12V to 170V 150V-220V Glow Tube High Voltage Boost DC Power Module F/ Nixie” from the usual sort of vendors You may need to burn your IN-9 tube in at higher current (20mA) for several hours to get the tube to light to the top.
Mechanical Files
The design comprises (from top to bottom)
Front
Spiral
base
When printing the spiral you will want to block supports inside the tube or you won’t be able to get the wires to the IN-9 in
To attach the “front” to the “spiral” requires a 4.4mm diameter M2.5 insert, the base requires five 3.5mm diameter M2.5 inserts
STLs for printing available here: https://github.com/bigcrimping/submerge/tree/main/mech